I finally took my project bike's rear wheel down to the Walk N Roll shop to discuss replacing the rim and spokes. The rim is steel and fairly rusty, and I thought the spokes were rusty/corroded too, so I figured this would be a good time to learn wheel-building.
Except the Great Olympia Bike Guru (i.e. David at Walk N Roll) tells me it's more complicated than either of us expected. The wheel has 40 spokes, which makes it a difficult rim to match -- most modern, alloy rims have 32 or 36 spokes. And the spokes aren't corroded, they're galvanized; they're supposed to look like that. On top of that, the rim, while made of the less-desirable-with-rim-brakes steel and sporting significant rust patches, is still structurally OK. It's not as simple as buying a new rim; I'll probably be looking for something off an older bike, plus modern spokes aren't quite the same shape. The flanges on steel hubs are thinner than on alloy ones, and modern spoke shoulders curve more gently, so best-case I'd need spoke washers, which are fiddly and expensive.
So, our verdict: rebuild with the current wheel and keep an eye out for both signs of further rusting on the current wheel and a matching rim, ideally a close enough match to use with the current spokes. A shot of something on the Frame Saver lines inside the rim won't hurt in the meantime.
Still waffling on the paint; now I'm thinking the sleek black or grey look won't really fit the "old-school" fluted fenders and generally chunky look. I wonder if I could mimic the colors and general spotty look of corroded copper or patinaed brass. I like that sort of blue-green you get with old copper, and if some of the original flat gold shows through it won't look that odd. So, hmm.
Still gotta figure out how to "unscrew right-hand ball ring completely and remove the cartridge from the hub shell" so I can get in and fix/grease the gears. I've identified the right-hand, i.e. drive side, ball ring but don't see any way to get ahold of it to turn it.*
Did buy it a new tire, though, now that I know for sure what rim I'll be using. Got pair of medium-cheap Schwalbes, in fact, so I could have a matched pair, because good ol' Deschutes had them in stock and because I really really like the expensive but impenetrable high-end Schwalbe Marathons I have on my beloved Breezer.
--------------------
*"Servicing the Sturmey-Archer AW Wide-Ratio Three-Speed Bicycle Hub" appears to want you to use a hammer and punch to do this, but I really don't see how, and anyway I'm not even surethey're not talking about the split-ring p[art before that, which isn't even mentioned here.
Showing posts with label wheels. Show all posts
Showing posts with label wheels. Show all posts
20191112
20190901
Next roadblock...
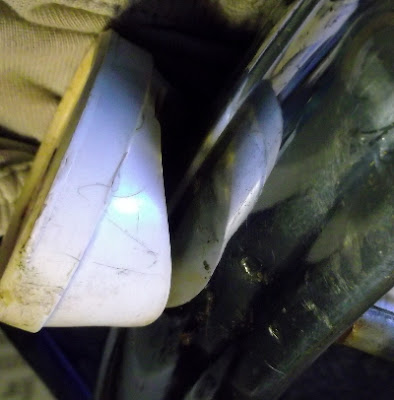
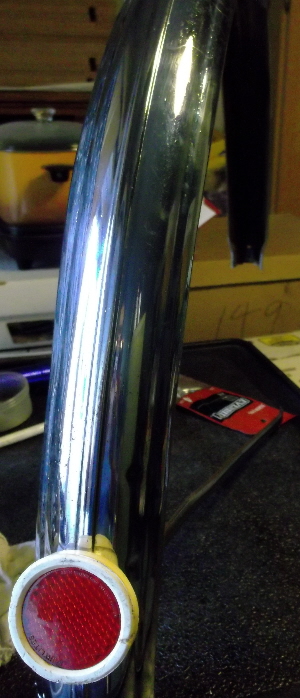
I finally got the rear fender as cleaned up as it's going to get. It polished up fairly well on the outside, especially once I got the reflector off, but I could only do so much with the heavily rusted inside. I decided not to worry about its little dings -- mostly not noticeable unless you're looking closely -- but did some hand-straightening of the supports and they look much better. I got the reflector off with an adjustable wrench; I think the bolt's not metric, although possibly I just wasn't getting the right angle with a regular one. It had quite a bit of guck trapped under it, so I got rid of that and hit the fender with some more polish. Washing the reflector itself got some water in under the cover, but that popped out and I took the rust remover to the cavity underneath. After some fiddling, I realized the bit of white paper under the cover was the real reflective bit, so since it had gotten wet on top of its rust stains I replaced it with a disk of reflective tape.


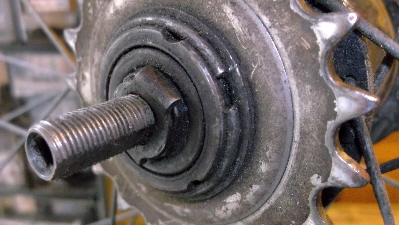
Then I had another look at the rear wheel and its fancy hub. Apparently I need a drift punch to remove a ring before I can get into the gear itself, so I'll have to take that down to WNR and use my volunteer privileges to borrow one. Maybe I should make myself a big canvas bag for carrying wheels around.

On the wheel subject: I got the front wheel cleaned up and put back together. Turns out the cotton twill rim tape isn't that odd, just higher-quality than today's normal. When I got to Deschutes and asked for rim tape, they asked if it was for a single-walled or double-walled rim. For double-walled rims you need better tape, for single you can get away with what's basically a big rubber band. I told them it's an older steel rim and guessed it might be double-walled since there are holes in the inside. They told me steel rims are always single-walled and I'd be fine with rubber.
A later web search offered a number of other suggestions, including several layers of electrical tape or strapping tape, but I suspect these would turn out to be more expensive than the rubber (mine was just over $3) as well as needing to be repaired/replaced more often.
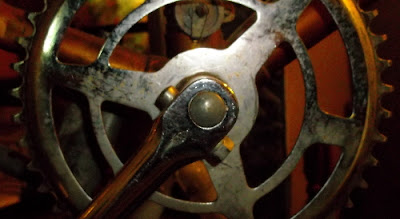
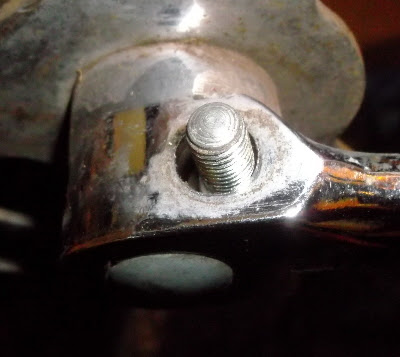
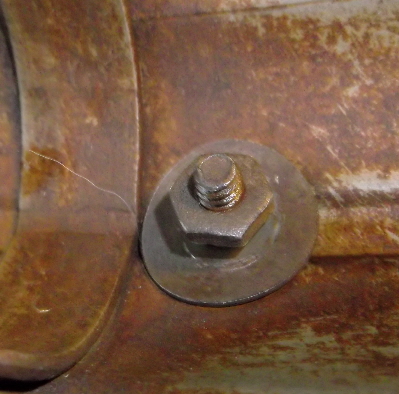
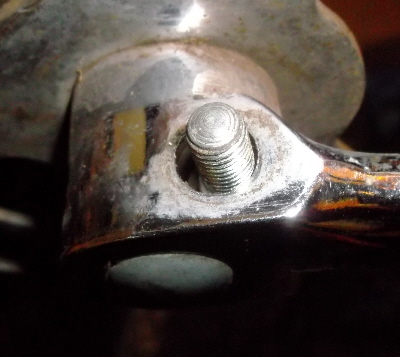
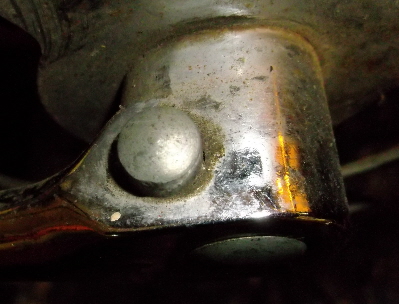
Foiled in that direction, I stared on removing the cranks to see if I can clean and service the bottom bracket. There's a weird sideways bolt thing happening there; I got the nut off but can't see how the bolt comes off (if it even does). The head is round so apparently it doesn't unscrew, but tapping it with a rubber mallet didn't (appear to) loosen it. So guess I'll have to consult David-the-Bike-Guru at the end of my next volunteer shift, unless I discover something useful before then.


Then I had another look at the rear wheel and its fancy hub. Apparently I need a drift punch to remove a ring before I can get into the gear itself, so I'll have to take that down to WNR and use my volunteer privileges to borrow one. Maybe I should make myself a big canvas bag for carrying wheels around.
On the wheel subject: I got the front wheel cleaned up and put back together. Turns out the cotton twill rim tape isn't that odd, just higher-quality than today's normal. When I got to Deschutes and asked for rim tape, they asked if it was for a single-walled or double-walled rim. For double-walled rims you need better tape, for single you can get away with what's basically a big rubber band. I told them it's an older steel rim and guessed it might be double-walled since there are holes in the inside. They told me steel rims are always single-walled and I'd be fine with rubber.
A later web search offered a number of other suggestions, including several layers of electrical tape or strapping tape, but I suspect these would turn out to be more expensive than the rubber (mine was just over $3) as well as needing to be repaired/replaced more often.
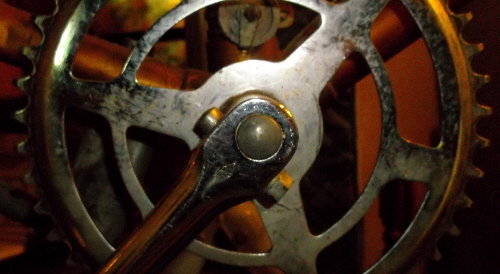
Foiled in that direction, I stared on removing the cranks to see if I can clean and service the bottom bracket. There's a weird sideways bolt thing happening there; I got the nut off but can't see how the bolt comes off (if it even does). The head is round so apparently it doesn't unscrew, but tapping it with a rubber mallet didn't (appear to) loosen it. So guess I'll have to consult David-the-Bike-Guru at the end of my next volunteer shift, unless I discover something useful before then.
Subscribe to:
Comments (Atom)